The Complete Seasonal Roofing Checklist: A Month-by-Month Guide from Skye Roofing
By Fernando, Owner, Skye Roofing Family owned. Every project, one craftsman.
Your roof is the single most important protective layer for your home. It stands against sun, wind, rain, snow, and ice day after day. Yet most homeowners only think about their roof when something goes wrong. For example, a drip in the living room or a shingle in the yard.
That reactive approach costs money. In my 15+ years of running Skye Roofing, I’ve seen small, preventable issues turn into expensive re-roofs simply because no one looked up.
The good news? You don’t need to be a roofing contractor to extend the life of your asphalt shingle roof. You just need a seasonal checklist and 15 minutes every few months.
Below is my complete, field-tested guide. I’ve organized it by season and added a “Fernando’s Field Note” for each season. This is the kind of sweat equity wisdom that comes from running every Skye Roofing project myself.
We are a premier residential roofing contractor near you.
Let’s start with spring, the most critical season for roof health in most climates.

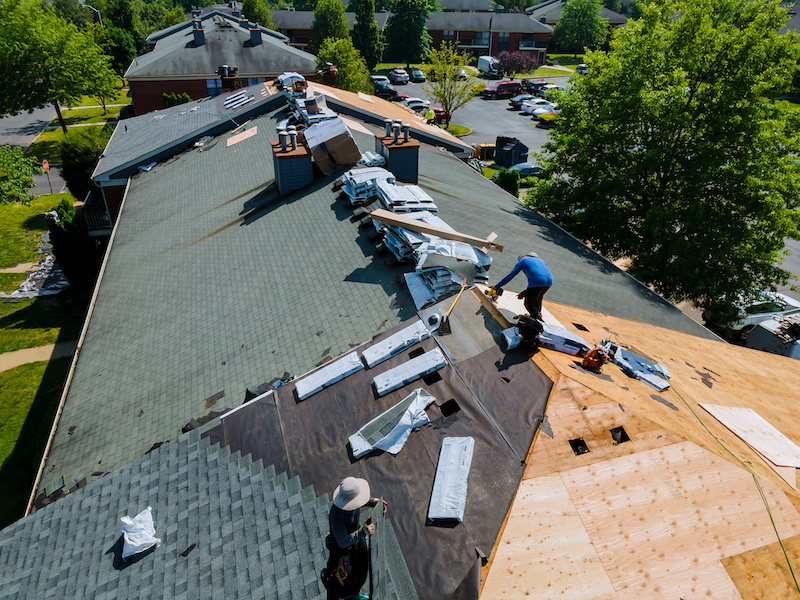
Spring (March – May): Repair Winter’s Damage
Spring is when your roof reveals every secret it kept under snow and ice. As temperatures rise, you’ll finally see the cracks, lifted shingles, and flashing failures that winter caused.
Step 1: Perform a Ground & Ladder Inspection
Never walk on a wet or icy roof. Instead:
- Walk around your house with binoculars. Look for missing, curled, or cracked shingles.
- From a ladder (safely placed on stable ground), check the gutters for excessive granules – asphalt granules that look like coarse sand. A few are normal; piles mean shingles are deteriorating.
- Examine metal flashings around chimneys, vents, and skylights. Look for rust, gaps, or pulled nails.
Fernando’s Field Note

I’ve gone to calls where a homeowner swore they needed a full re-roof because they saw “dark spots.” Nine times out of ten, it was just lichen or moss. Don’t panic. Call if  you see actual light coming through your attic.
Step 2: Clean Gutters and Downspouts
Winter leaves behind a mess: pine needles, leaves, broken twigs, and shingle grit. Clogged gutters force water to back up under your shingles, rotting the roof deck and fascia boards.
- Scoop debris by hand (wear gloves) or use a gutter scoop.
- Flush downspouts with a garden hose. Water should flow freely.
- Check gutter seams for leaks. A small drip now becomes a rotted fascia by summer.
Step 3: Inspect Attic for Leaks
After a heavy spring rain, go into your attic with a flashlight.
- Look for water stains, dark wood, or white mineral deposits (efflorescence).
- Check insulation for wet spots or mold.
- Follow any trail of water upward – that’s where your leak originates.
Fernando’s Field Note

I don’t care how perfect the shingles look from outside. If your attic has a drip, something is wrong. I once found a leak that traveled 12 feet from a tiny nail pop near the ridge. The homeowner had painted their ceiling three times before calling me.
Step 4: Trim Overhanging Branches
Spring growth is aggressive. Cut back any tree limbs that touch or hang within six feet of your roof.
- Rubbing branches wear away shingle granules.
- Falling limbs punch holes.
- Shaded areas stay damp, encouraging moss and algae.
Many homeowners ask me about switching to tile to avoid spring maintenance. I tell them the truth. Tile roofs have their own issues: they're extremely heavy (often requiring structural reinforcement), the tiles are brittle and crack easily when walked on, and repairs are expensive because matching old tiles is difficult. We focus on what we do best: residential asphalt shingle re‑roofs, repairs, and reboots. That specialization means we catch things a general contractor would miss. When you are looking for a reliable roofing company to do roof repairs or roof replacement call us for a free estimate.
Summer (June – August): Beat the Heat & Ventilation Check
Summer sun is brutal on asphalt shingles. UV radiation breaks down the oils that keep shingles flexible. Poor ventilation makes it worse, turning your attic into an oven that cooks shingles from below.
Step 1: Check Attic Ventilation
Go up to your attic on a hot afternoon (over 80°F outside).
- It should feel warm but not suffocating. If it’s unbearably hot, your ventilation is inadequate.
- Look for soffit vents (under the eaves) – they must be clear of insulation. Contractors often blow insulation right over them.
- Ensure ridge vents or roof vents aren’t painted shut or blocked by bird nests.
Signs of poor ventilation:
- Excessive heat radiating from the ceiling inside your home.
- Higher than normal air conditioning bills.
- Premature shingle curling or cracking.
Fernando’s Field Note

I walked into an attic last July that was 160°F. The homeowner had installed radiant barrier but blocked all the soffits. His shingles were only seven years old but looked like they were fifteen. We added soffit baffles and a ridge vent – problem solved. No new roof needed.
Step 2: Inspect for Algae & Moss
Summer humidity feeds roof algae (black streaks) and moss (green, fuzzy patches).
- Algae is mostly cosmetic but can hold moisture against shingles over time.
- Moss is destructive – its roots work under shingle edges and lift them.
Treatment (no pressure washer!):
- Mix a 50/50 solution of water and bleach-free roof cleaner (or use a commercial moss killer).
- Apply from a ladder with a garden sprayer – never walk on a mossy roof (it’s extremely slick).
- For heavy moss, gently lift it with a plastic scraper. Do not use a wire brush or power washer – that strips granules and voids shingle warranties.
Step 3: Check Flashing & Sealants
Summer heat expands metal, and old sealant dries out.
- Examine pipe boots (the rubber seals around plumbing vents). Cracks or gaps mean water will pour in during the next rain.
- Look at step flashing along sidewalls. Shingles should cover the flashing; if flashing is exposed, it’s likely failed.
- Check chimney counter‑flashing – it should be embedded in mortar or sealed with high‑grade caulk.
Fernando’s Field Note

Pipe boots fail constantly. They cost about $15, but I’ve seen leaks destroy ceilings, insulation, and even hardwood floors. When I run a repair, I always check every boot on the roof, not just the one the homeowner called about.
Step 4: Clean Solar Panels (If You Have Them)
Solar panels create shade that traps moisture and debris.
- Hose panels down early in the morning (never when they’re hot as thermal shock can crack glass).
- Remove leaves and bird droppings gently with a soft brush on an extension pole.
- Check the seal between panels and the roof. If you see dried, cracked sealant, call a pro.
Pro tip from Fernando

We don’t install or remove solar panels, but we see the damage they hide. If you’re getting a roof inspection, tell me you have solar. I’ll look around the mounts carefully – that’s a common leak point.
Fall (September – November): Prepare for Winter Storms
Fall is the last chance to catch problems before snow and ice arrive. Once temperatures drop below freezing, most repairs become difficult or impossible.
Step 1: Deep Clean Gutters & Install Guards
Fall leaves are beautiful but deadly for roofs.
- Clean gutters twice during fall – once in early October, once in late November.
- Downspouts should drain at least five feet away from your foundation.
- Consider installing foam or screen gutter guards. They don’t eliminate cleaning but reduce frequency.
Fernando’s Field Note

I hate cleaning gutters as much as anyone, but I’ve seen ice dams form because a single downspout was clogged by a couple of maple leafs. That ice dam pushed water under three courses of shingles. The homeowner needed new decking and a full re‑roof on that slope – over $4,000 of damage from a few leafs.
Step 2: Inspect Shingle Adhesion
Asphalt shingles are self‑sealing. Each shingle has a strip of adhesive that bonds to the shingle below it when warmed by the sun.
- In fall’s cooler weather, walk around and look for shingles that are lifting at the edges (we call them “flappers”).
- Gently press down on a few. They should feel stuck. If they lift easily, the seal has failed.
- High winds will rip off unsealed shingles.
How to fix: A roofing professional can apply a small bead of asphalt plastic cement under each lifted shingle and press it down. Do not use caulk or construction adhesive – it’s too rigid and will crack.
Step 3: Check for Ponding Water on Flat Roof Sections
Even homes with pitched roofs often have small flat areas – above porches, garages, or entryways.
- After a rain, look for water that remains for 48+ hours. That’s ponding.
- Ponding water accelerates aging, grows algae, and increases leak risk.
- A proper fix might involve adding tapered insulation or installing new low‑slope membrane (modified bitumen or TPO).
We work on residential re‑roofs, repairs, and reboots. For tile roofs, we refer you to trusted partners. Why? Because specialization means we’re the best at shingles. I’d rather turn down work than do a mediocre job on a material I don’t install daily.
Step 4: Inspect Attic Insulation
Good insulation keeps your roof cold in winter – counterintuitive, but true.
- Warm attic air melts snow on the roof. That water runs down and refreezes at the eaves, creating ice dams.
- Recommended attic insulation: R‑38 to R‑60 (roughly 12–18 inches of fiberglass or cellulose).
- Also check for air leaks around light fixtures, plumbing stacks, and attic hatches. Seal them with spray foam or weatherstripping.
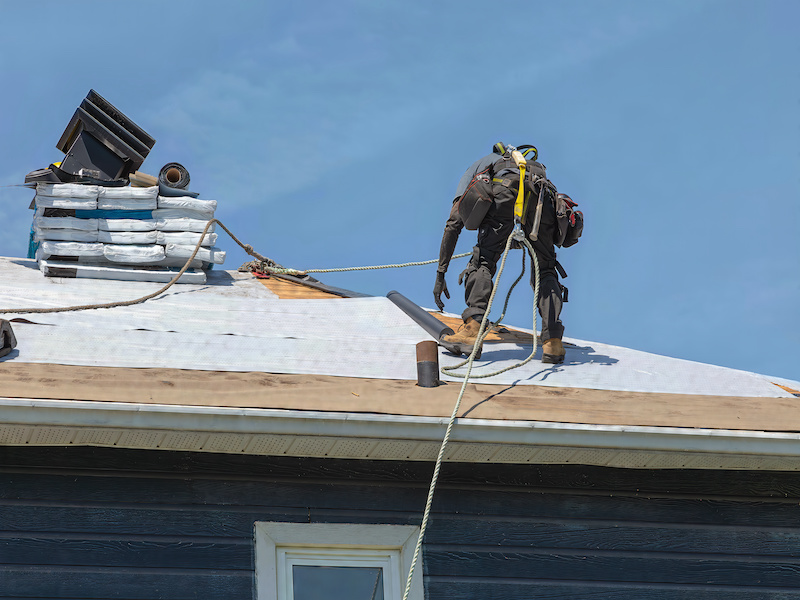
Winter (December – February): Damage Control & Safety First
Winter is not the time for DIY roof work. Cold shingles are brittle and crack when walked on. Snow and ice make falls likely. Instead, focus on monitoring and emergency response.
Step 1: Watch for Ice Dams
Ice dams are ridges of ice that form at the edge of your roof, preventing melting snow from draining. Signs of an ice dam:
- Icicles hanging thickly from gutters (a few small icicles are normal).
- Water stains on interior walls or ceilings near exterior walls.
- Ice pushing up under shingles.
What to do:
- Never chip ice with a hammer or shovel – you’ll destroy shingles.
- Use a roof rake to pull snow off the first 3–4 feet of roof after every snowfall.
- Fill a nylon stocking with calcium chloride ice melt (not rock salt since rock salt damages shingles and plants) and lay it vertically across the ice dam to melt a channel.
Fernando’s Field Note

We get desperate calls every January. Someone saw an ice dam, got on a ladder with a hatchet, and now they have a roof leak AND a broken arm. Please – just call us. We have steamer units that remove ice safely. Or better yet, rake your snow before the dam forms.
Step 2: Monitor for Snow Load
Most residential roofs are designed to hold about 20 pounds per square foot of snow. That’s roughly 2 feet of light, fluffy snow or 8 inches of wet, heavy snow. Red flags:
- Creaking or popping sounds from the attic.
- Interior doors that stick or won’t close.
- Cracks in drywall (especially around door frames).
Action: If you see any of these, call a roofer immediately. Do not go on the roof. In extreme cases, fire departments can help remove snow.
Step 3: Check Attic for Frost or Condensation
Go into your attic on a very cold day.
- Look at the underside of the roof sheathing. Do you see frost, moisture, or black mold patches?
- Frost means warm, moist air from your living space is leaking into the attic.
- This moisture will rot the roof deck over time and can lead to structural damage.
Fix: Improve bathroom and kitchen exhaust venting. Make sure vents go outside, not into the attic.
Step 4: Emergency Leak Response
If you develop a leak during a winter storm:
- Place a bucket or trash can under the drip.
- Poke a small hole in the ceiling (at the lowest point of the water stain) to let water drain – this prevents a large ceiling collapse.
- Move furniture and electronics away.
- Call Skye Roofing. We prioritize emergency repairs even in bad weather.
What we’ll do: We’ll tarp the affected area, break up ice dams, or apply temporary sealant until a proper repair can be made in warmer weather.
General Checklist: Quick Wins for Roof Longevity
These tasks require no seasons, just a few minutes every couple of months.
Trim Trees Regularly
- Keep branches at least 6 feet from your roof.
- Remove dead or dying limbs that could fall.
Keep Your Attic Ventilated & Insulated
- Check vents for bird nests or debris every 6 months.
- Insulation should be dry and evenly distributed.
Document Everything
- Take photos of your roof from the same angles each season.
- Save repair receipts and warranty info.
- Date each inspection and note any changes.
Know When to Call a Pro
Call Skye Roofing if you see:
- Curled, cracked, or missing shingles (more than a handful).
- Granules filling your gutters after every rain.
- Light visible in your attic.
- Any leak, past or present.
- A roof over 20 years old (asphalt shingles typically last 20–25 years with good maintenance).
When NOT to call us (yet):
- One or two loose shingles is something you can cement down yourself.
- Minor moss on a north slope, be sure to clean it with spray.
- A small icicle is just winter.
Why Skye Roofing’s Approach Is Different
We’re a family‑owned business. Every project. Whether it's a small repair, a reboot (re‑nailing loose shingles), or a full residential re‑roof all of our projects are run by me, Fernando, personally. I’m not a project manager who visits once a week. I’m on your roof, checking every nail, every flashing detail, every valley cut.
That also means I’m honest. If your roof only needs a repair, I’ll tell you. If you have three years left, I’ll show you why. And if you ask for a metal roof, I’ll politely decline and recommend an excellent contractor who specializes in it. We do one thing, and we do it brilliantly: asphalt shingle roofing.
Our expertise is residential roof replacement in Medford, Ashland, White City and the surrounding communities.
Ready to Get Your Roof on a Seasonal Schedule?
You don’t need to become a roofing expert. Just follow this checklist four times a year. Bookmark it, print it, share it with a neighbor. The 15 minutes you invest each season will add years to your roof’s life and save you thousands in preventable damage.
Need a professional eye?
Contact Skye Roofing for a seasonal inspection or repair estimate. We serve residential homeowners only – no metal roofs, no commercial jobs, no shortcuts.
👉 Visit skyeroofing.com or call us today at (541) 200-5269. I’ll answer your questions personally.
Because a roof that’s cared for, season after season, is a roof that protects everything you love.
Download or print this season guide for Medford residential roofing.
 About the author

Fernando is the owner and lead craftsman of Skye Roofing, a family‑owned business specializing in residential asphalt shingle re‑roofs, reboots, and repairs. He runs every project personally, from first estimate to final sweep.